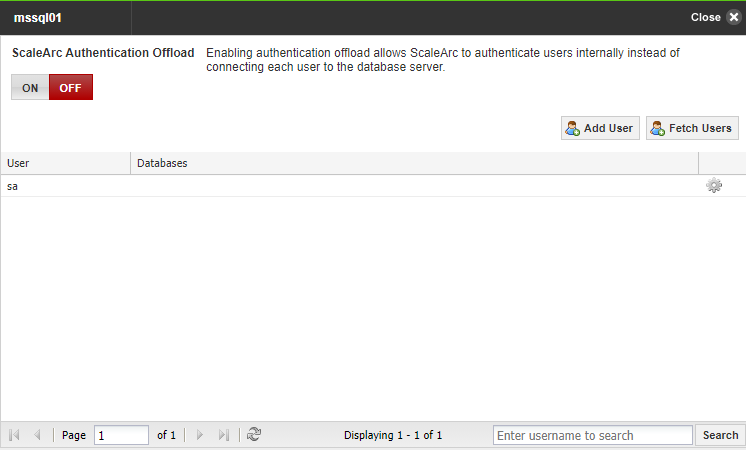
The Users & DBs icon located under the Settings column in the cluster control panel is used for enabling/disabling ScaleArc Authentication Offload. Enabling authentication offload allows ScaleArc to authenticate users internally instead of connecting each user to the database server which can speed up performance significantly.
ScaleArc also provides session management through connection pooling and multiplexing thereby client sessions terminate on ScaleArc instead of the target database. This reduces the total number of sessions to the DB servers which in turn increases performance.
Follow these steps to enable Authentication Offload and manage users associated with the cluster.
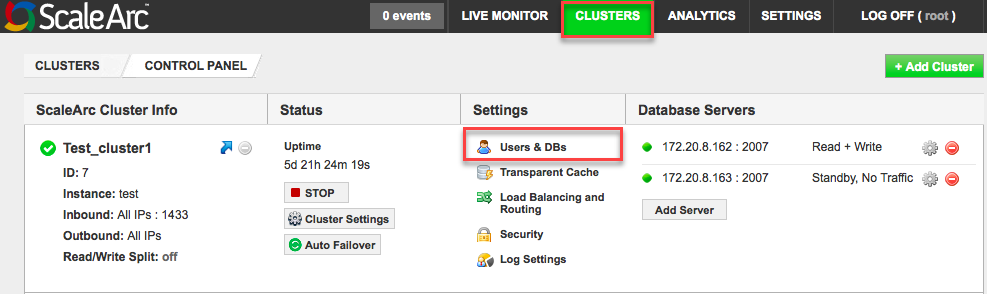
- On the ScaleArc dashboard, click CLUSTERS.
- Go to the Settings column. Click on Users & DBs to open the user configuration screen.
- Notice that the screen lists the existing users associated with the cluster.
-
Reference the below table while making configuration changes to the various fields:
Field Description Default/User Input ScaleArc Authentication Offload
ON/OFF toggleFunctions like a "master switch" for Offload settings. When enabled, this option lets ScaleArc authenticate users internally instead of connecting each user to the database server.
To toggle the ON/OFF setting you must first stop the cluster.
Note that to disable this option, first disable the Read/Write Split and Prep-exec handling settings. Only then does the GUI allow you to disable Authentication Offload.Default is ON. Note that when OFF, Windows Authentication Offload and Kerberos Authentication Offload are hidden. Set it to ON for Kerberos delegation to work. Add User Allows you to add a new user (existing on the DB server) to the ScaleArc cluster. Click to open and add a user. Fetch Users Enables Auto Fetch Database Users, which automatically updates the user password changes and addition/deletion of new users. Click to Auto Fetch database users. Gear icon Helps to manage (add or remove) a logical DB for a particular user. You can also change a password for a particular user. Databases must be specified here to be fully accessible.
1 Click on the Gear icon to configure the DBs for the user. 2 Click on the Change password button to assign a new password. User A list of one or more users who are enabled on ScaleArc to execute various statements against the database server.
Databases The names of the logical database(s) associated with the user. Search Allows you to search for a user. Enter a username to search.
Add Users
Follow these procedures to add a user to the cluster.
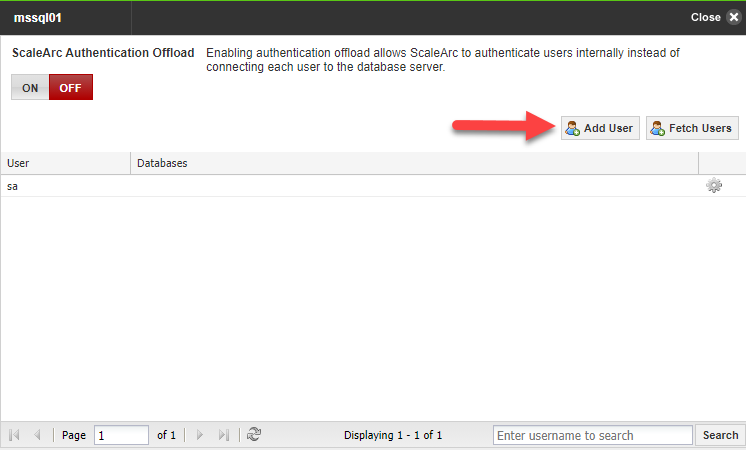
- Click Add User.
-
Enter the user name and password for the new user. Assign the user one or more databases by moving the selected database from the left panel to the right.
Note: If you select the checkbox for adding a Kerberos user, make sure you enter the username as username@domain. You do not need to enter a password for a Kerberos cluster.
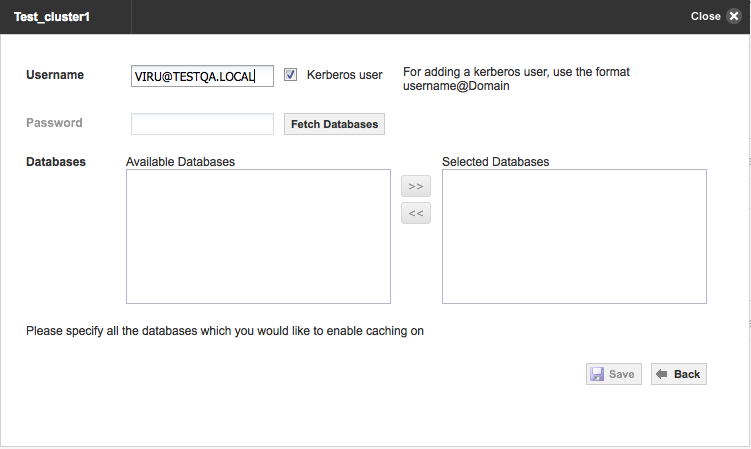
- Click Save. This action adds a new user to ScaleArc.
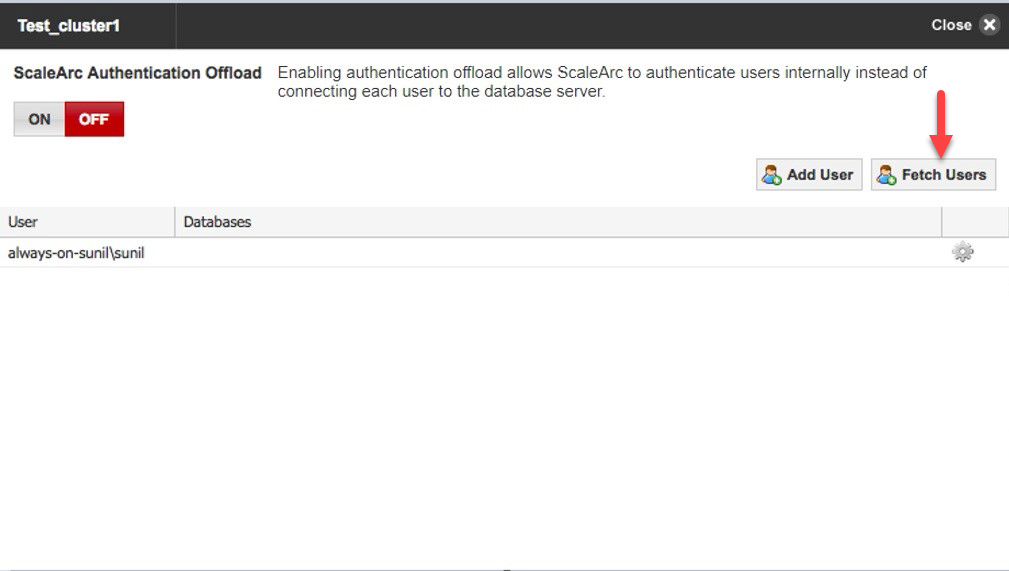
Fetch Users
Alternatively, you can enable Auto Fetch. This option works when you are integrated with Active Directory. This action automatically adds the databases to which the users have permissions. Auto fetch also auto-updates any modifications to users. Note that this option is not available for Azure SQL Database.
- Click Fetch Users.
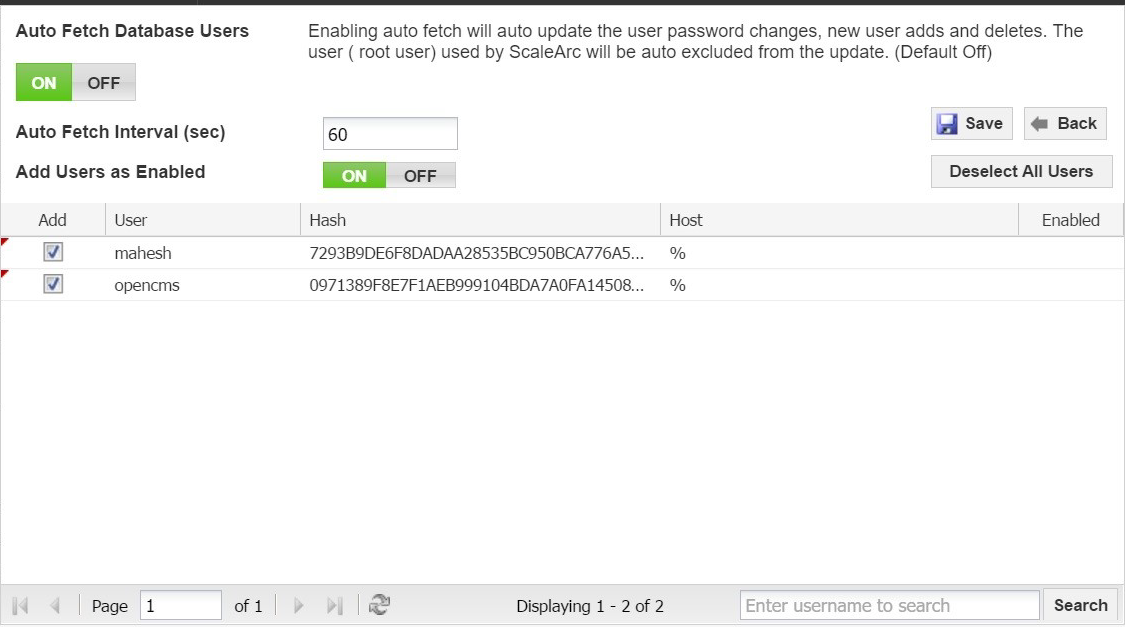
- Use the toggle switch to turn ON Auto Fetch Database Users if necessary.
- Click Select All Users listed on the screen.
- If you do not see the users in the Auto Fetch Users list, check if they are listed in the User Failure List under Live Monitor > Cluster Stats [cluster-name] and scroll to the bottom of the page. If the user exists in the User Failure list, set the appropriate privileges as described in the following KB article on how to set user replication privileges.

- Enter the Auto Fetch interval in seconds. This sets the interval between each auto fetch. Default is 60 seconds.
- Click Save.
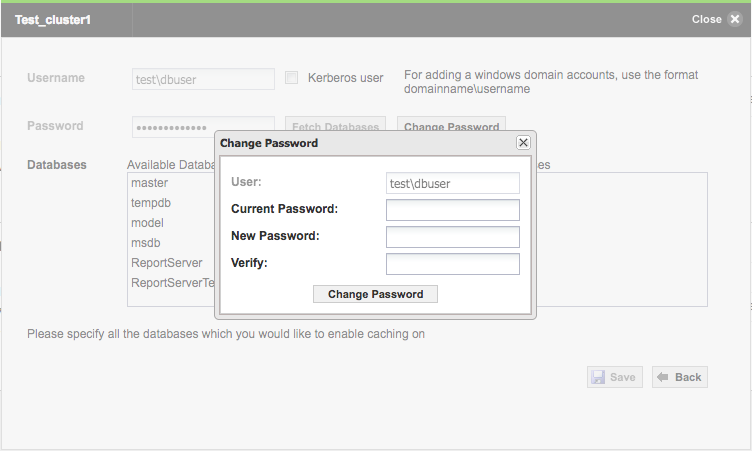
Modify database assignment and password
You can easily reassign databases or change the database password for a user by following these steps:
Note: Password change is only possible for a user added manually in a normal cluster.
- Click on the gear icon next to the database user.
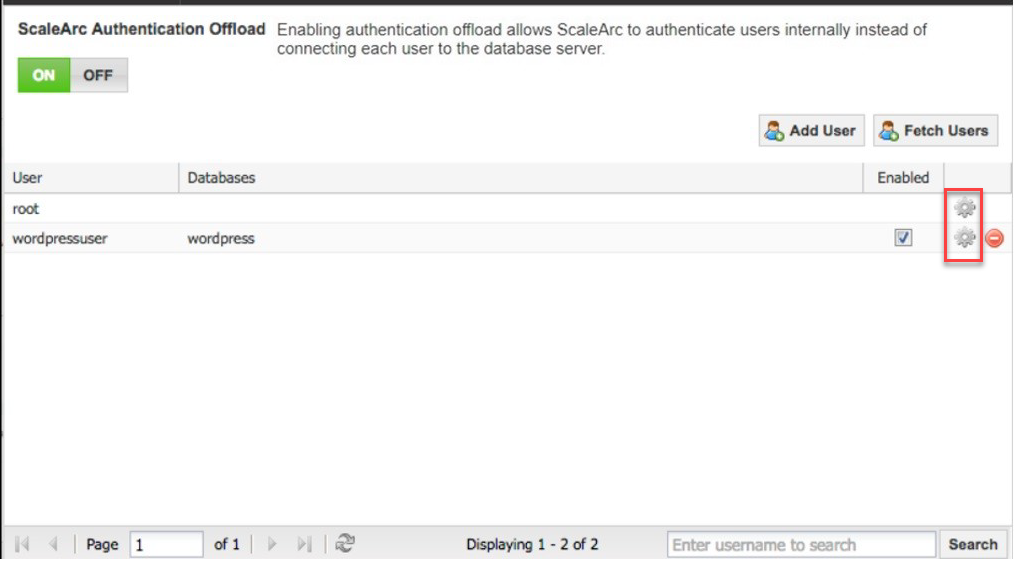
- Reassign one or more databases to the user (see background screen below).
- Click the Change Password button to set a new password by providing the current password and preferred New Password in the Change Password dialog.