
The Transparent Cache feature makes it possible to configure the databases for which query responses need to be cached and specify the patterns or rules that trigger data cache. Once these rules have been set up, frequently used queries will be offloaded to ScaleArc to reduce database load and improve stored procedure response times.
This article describes the procedure for configuring the stored procedure query caching feature.
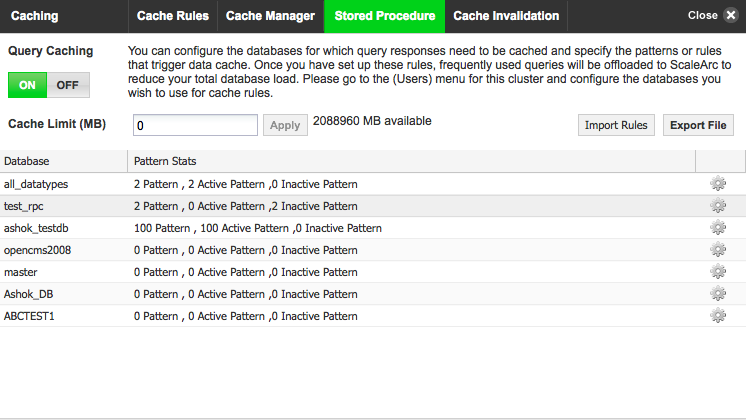
From this Stored Procedure tab, you can configure the databases for which stored procedure query responses should be cached and specify the patterns or rules that trigger data cache. Refer to Query Caching as a guide on when to keep ON or turn OFF this feature (ON by default).
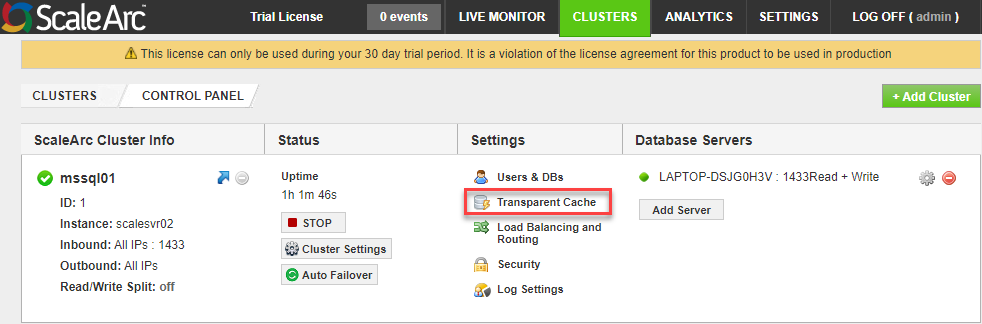
- On the ScaleArc dashboard, navigate to CLUSTERS > Settings column > Transparent Cache.
- Click on the Stored Procedure tab.
List stored procedures
- Click on the gear icon against the database you want to enable for stored procedure query caching.
-
Follow the table to configure the stored procedure feature. Refer to Query patterns for a description of the remaining widgets on the screen.
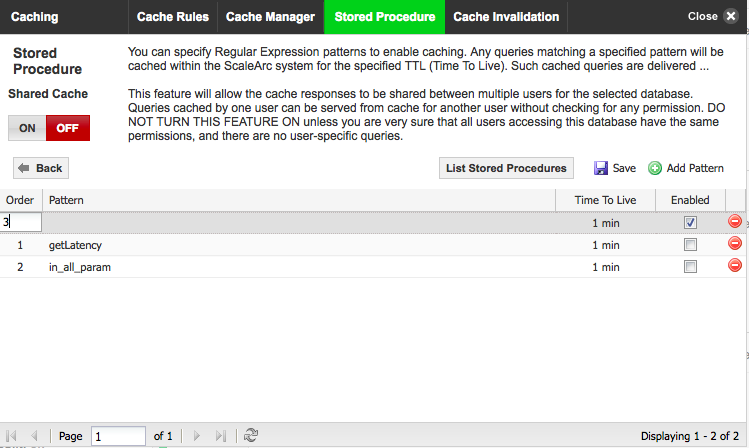
Field Description Default/User input Shared Cache Turn Shared Cache feature ON to allow cache response to be shared between multiple users for a particular database.
Warning: Turn this feature ON only if you are sure that all users accessing the database have the same permissions.Default is OFF. List Stored Procedures Lists stored procedure kept on the server. For the selected database, the list displays only those procedures that have not yet been added as stored procedure patterns for caching.
Select and add to cache. - Click List Stored Procedures.
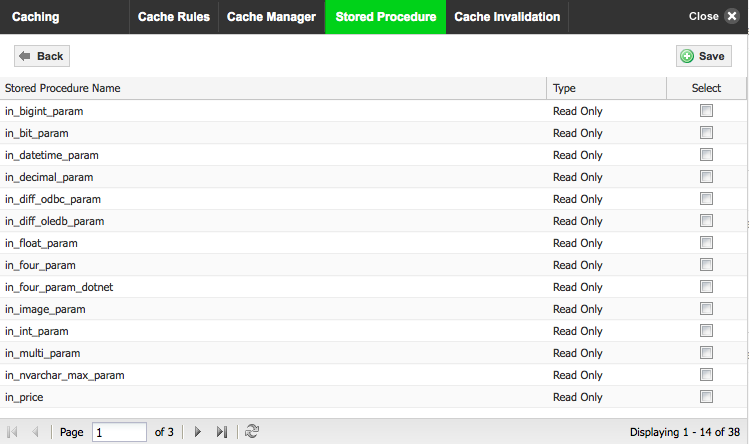
- Select the patterns to add to the cache.
Add a pattern
ScaleArc provides an easy way to add a pattern to a cache rule.
- Click on the Add Pattern button.

- Enter the order number.
- Tab over and enter the pattern's Regular Expression in the next field.
- Enter the TTL value and enable/disable as required.
- Click Save.
- To edit, delete the pattern and recreate, using the Add Pattern button.