
Follow the steps below to install ScaleArc on Microsoft Hyper-V 2012 or later.
The article contains the following subsections:
Prerequisites
- A download of the ScaleArc GA software release in ISO format
- A Windows Hyper-V environment (2012 or later) containing one or more servers, with 16GB of RAM and 8 virtual CPUs available
- Local or shared storage with at least 100 GB for the operating system and 2TB of available space for logs
Create a virtual machine
Use the Hyper-V Manager to create a new virtual machine:
Note that your environment view may differ slightly from the screenshots included in this section depending on your Microsoft Hyper-V version.
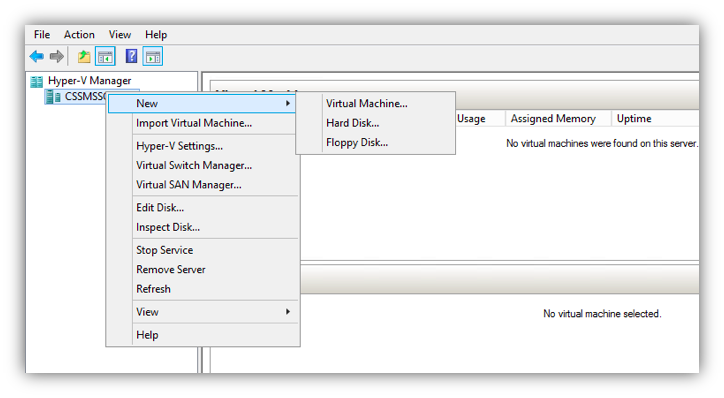
- Right-click on the physical server in the left panel where you want to create your virtual machine. From the right-click menu select New and then Virtual Machine.
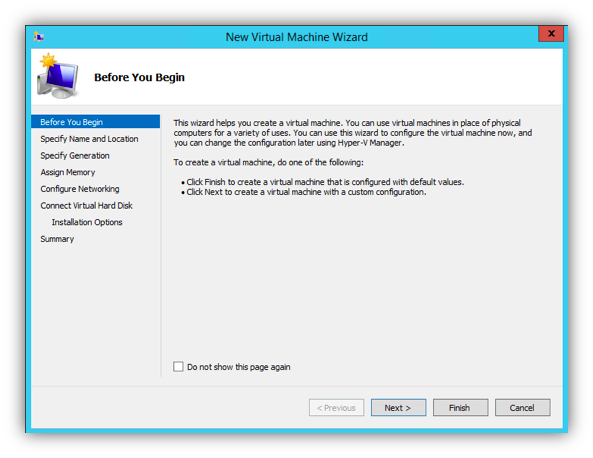
- The New Virtual Machine Wizard appears. Click on Next to continue.
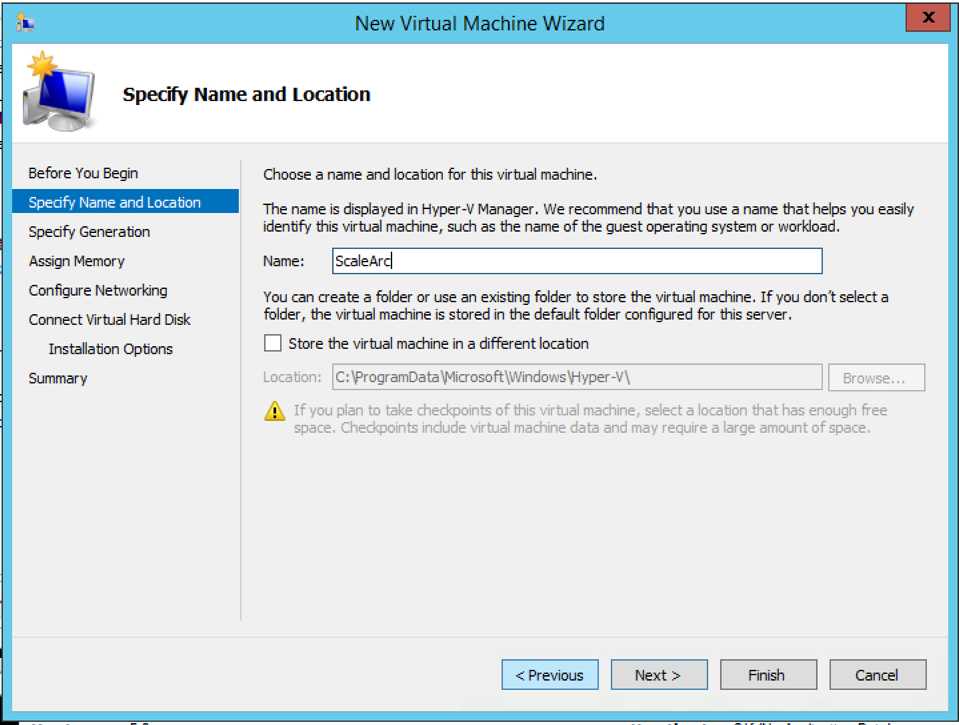
- Choose a name for the virtual machine and the location to store your virtual machine configuration files. Then, click Next.
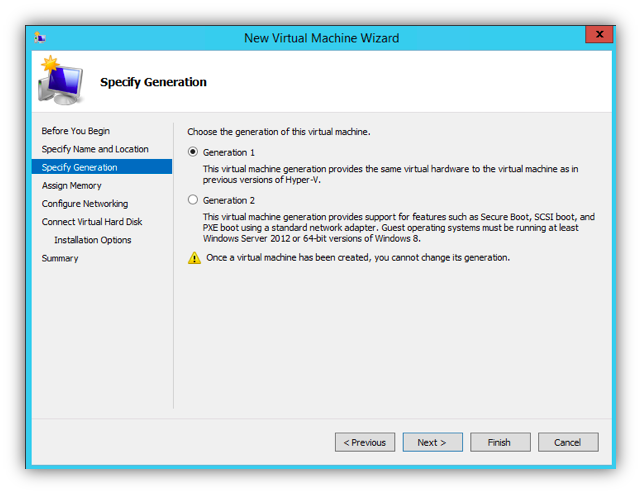
- Select 'Generation 1' when prompted to choose the generation for this virtual machine and click Next.
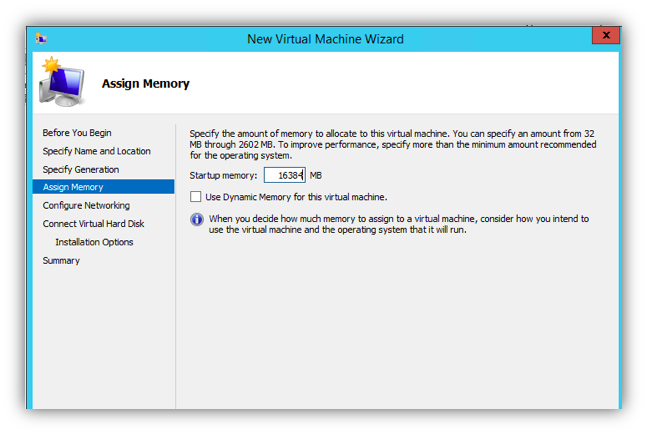
- Configure the amount of memory you wish to allocate for your virtual machine. The recommended minimum memory is 16GB. Click Next to continue.
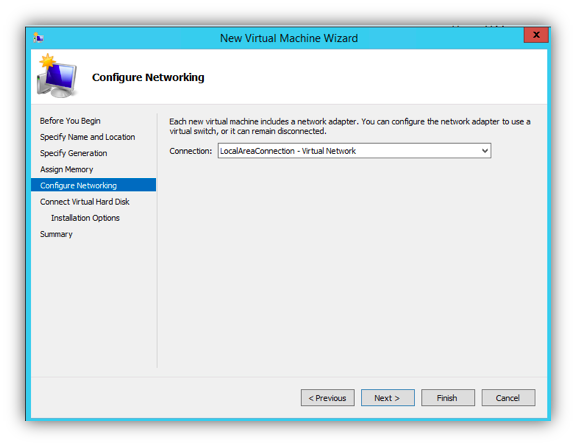
- Choose the virtual network adaptor you wish to configure for this virtual machine. Select the appropriate connection for the virtual switch and click Next.
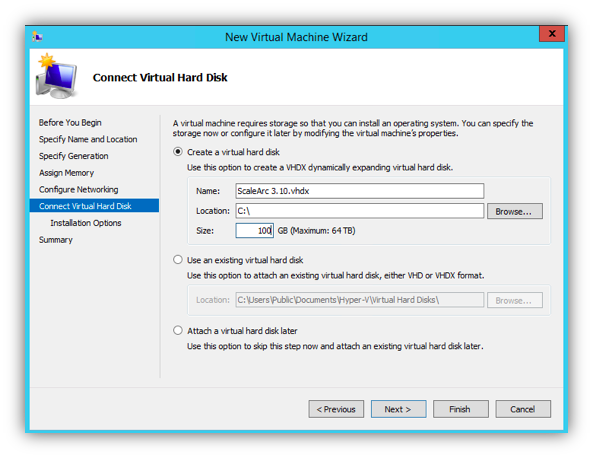
- Create a Virtual Hard Disk. Refer to ScaleArc Sizing Guide for details. Click Next.
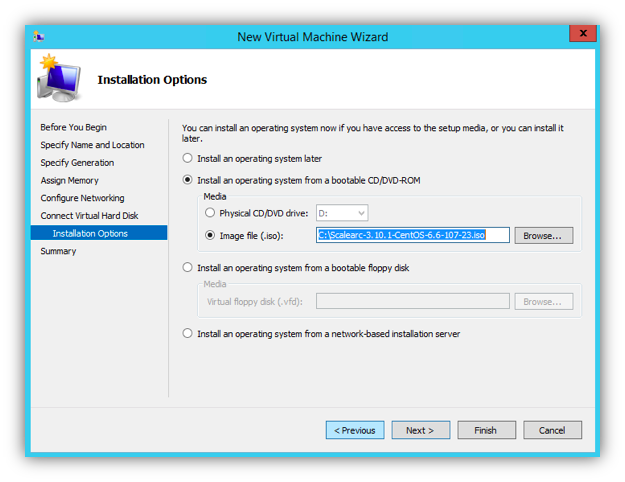
- Browse for the installation media for your Virtual Machine OS, and click Next.
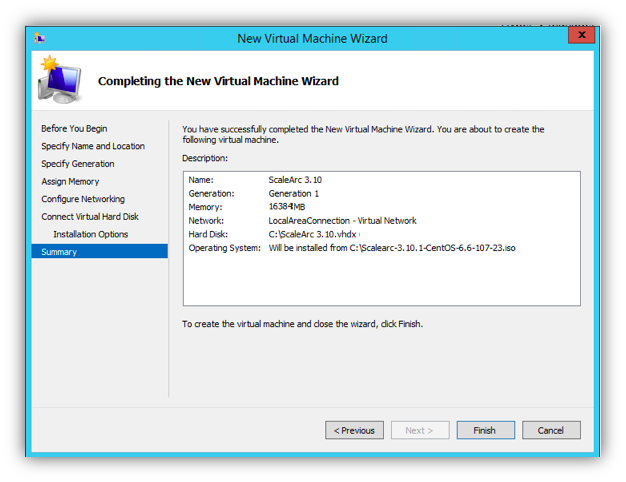
- Review the settings for the new virtual machine. Click on Finish to create the virtual machine and close the wizard.
Configure the virtual machine
Configure the VM to meet the minimum ScaleArc system requirements by following these steps:
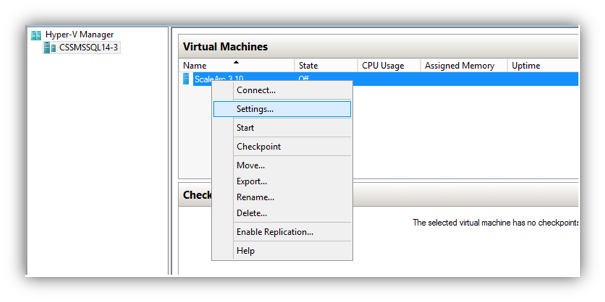
- Right-click on the newly-created VM from the Hyper-V Manager and click on Settings.
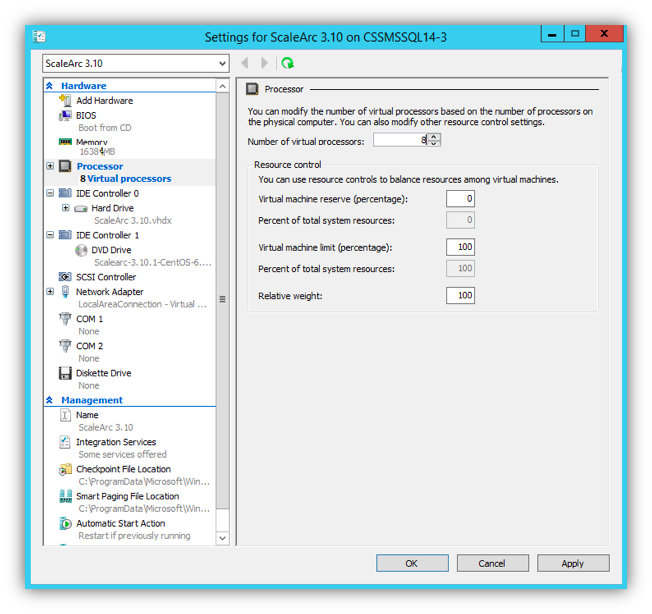
- Click on Processor under Hardware to change the number of virtual processors to eight. Click Apply.
Note: ScaleArc needs a minimum of eight virtual processors else a kernel panic occurs and blocks the ScaleArc startup. As a rule of thumb, the total CPUs allocated should be at least two larger than the ScaleArc license that is being installed on the system. Refer here for ScaleArc Sizing Guide.
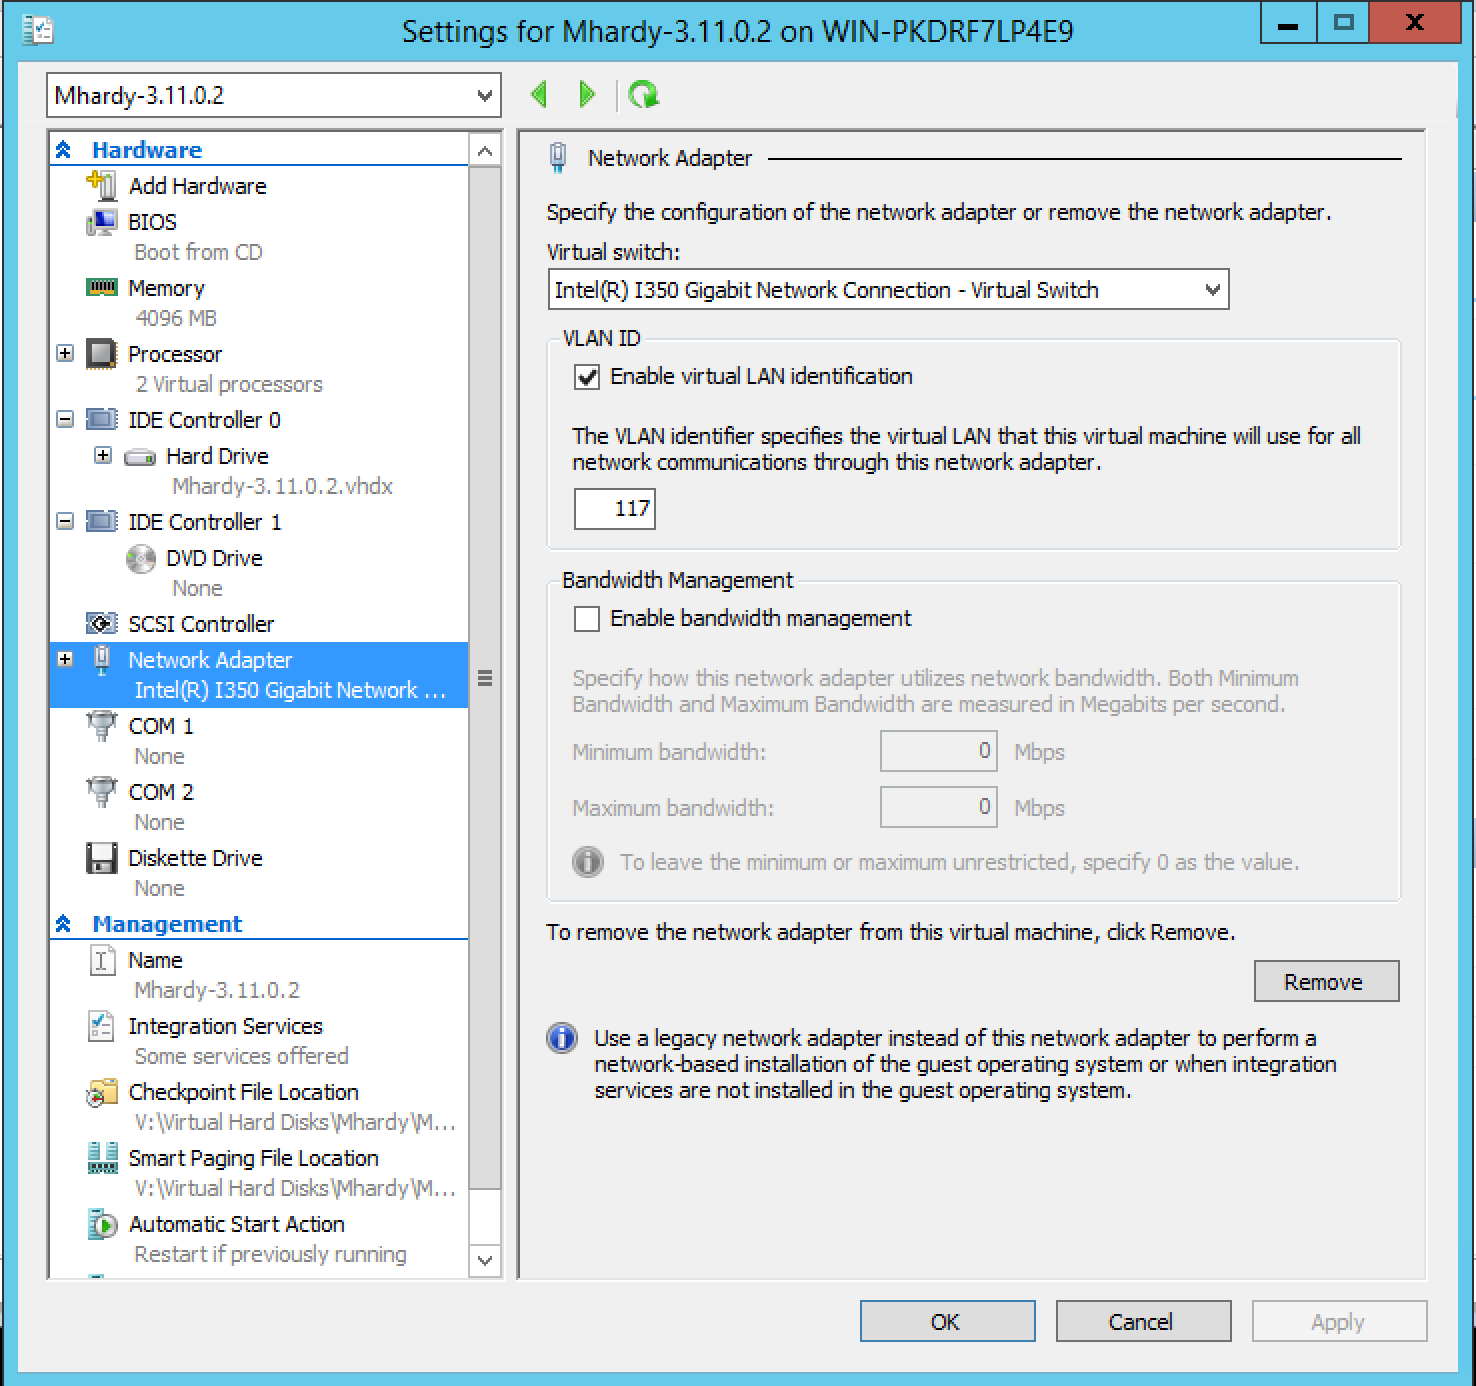
- If you need to configure the VLAN setting for your network, select Network Adapter in the left panel and select the checkbox for Enable Virtual LAN identification. Thereafter enter the VLAN ID.
- Power on the virtual machine.
Install ScaleArc on Hyper-V
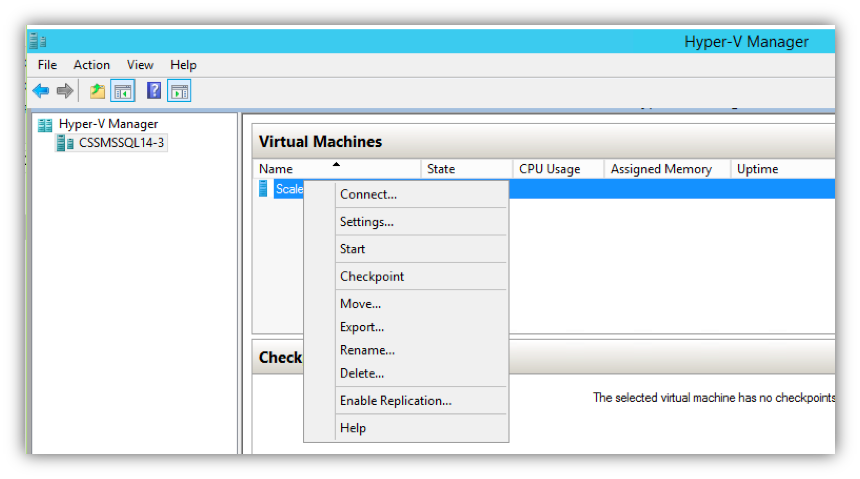
- In Hyper-V Manager, right-click on the virtual machine and click on Connect to power on the virtual machine and start the installation.
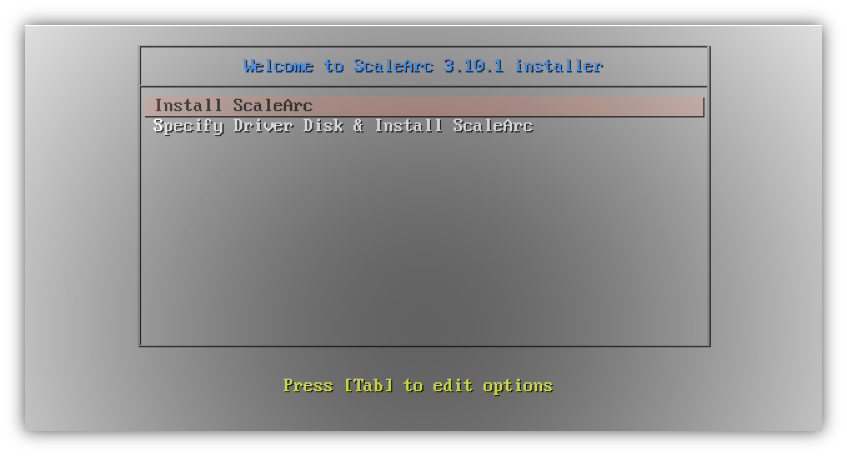
- Select the Install ScaleArc option on the Welcome to ScaleArc Installer screen. Hit Enter.
- Upon successful installation, the ScaleArc appliance automatically restarts and displays the ScaleArc console login prompt. The appliance UI cannot be accessed at this point therefore follow the steps outlined in ScaleArc Appliance Console Login to connect to the appliance and configure the requisite IP address to enable access to the UI.
- Follow these steps to add MAC address anonymity. We recommend these steps for all ScaleArc virtual machines to ensure that when they are brought up, their MAC address does not change:
- SSH to the ScaleArc console. (Refer to Enable SSH access to ScaleArc using User Interface for details.)
- Follow these steps to edit the ifcfg-eth0 config file using the vi editor:
-
sudo vi /etc/sysconfig/network-scripts/ifcfg-eth0 - Delete the following lines entirely from the file:
-
NM_CONTROLLED
HWADDR
UUID
TYPE
-
- Make sure your file contains only these settings:
-
Device="eth0"
BOOTPROTO=static
IPADDR=<your ipaddr>
NETMASK=<your netmask>
ONBOOT=yes
-
-
- Save and quit by first entering a colon (:), then wq (:wq)
- Run the following command:
-
rm /etc/udev/rules.d/70-persistent-net.rules
- Repeat step 8 as necessary for any additional interfaces. Use the ifconfig command from the command line to identify them. Note that you need to remove the 70-persistent-net.rules file only once.
-
- Restart the VM and proceed to Initialize ScaleArc.
Best practices for VM migration
Refer to this linked article for important recommendations regarding VM migration